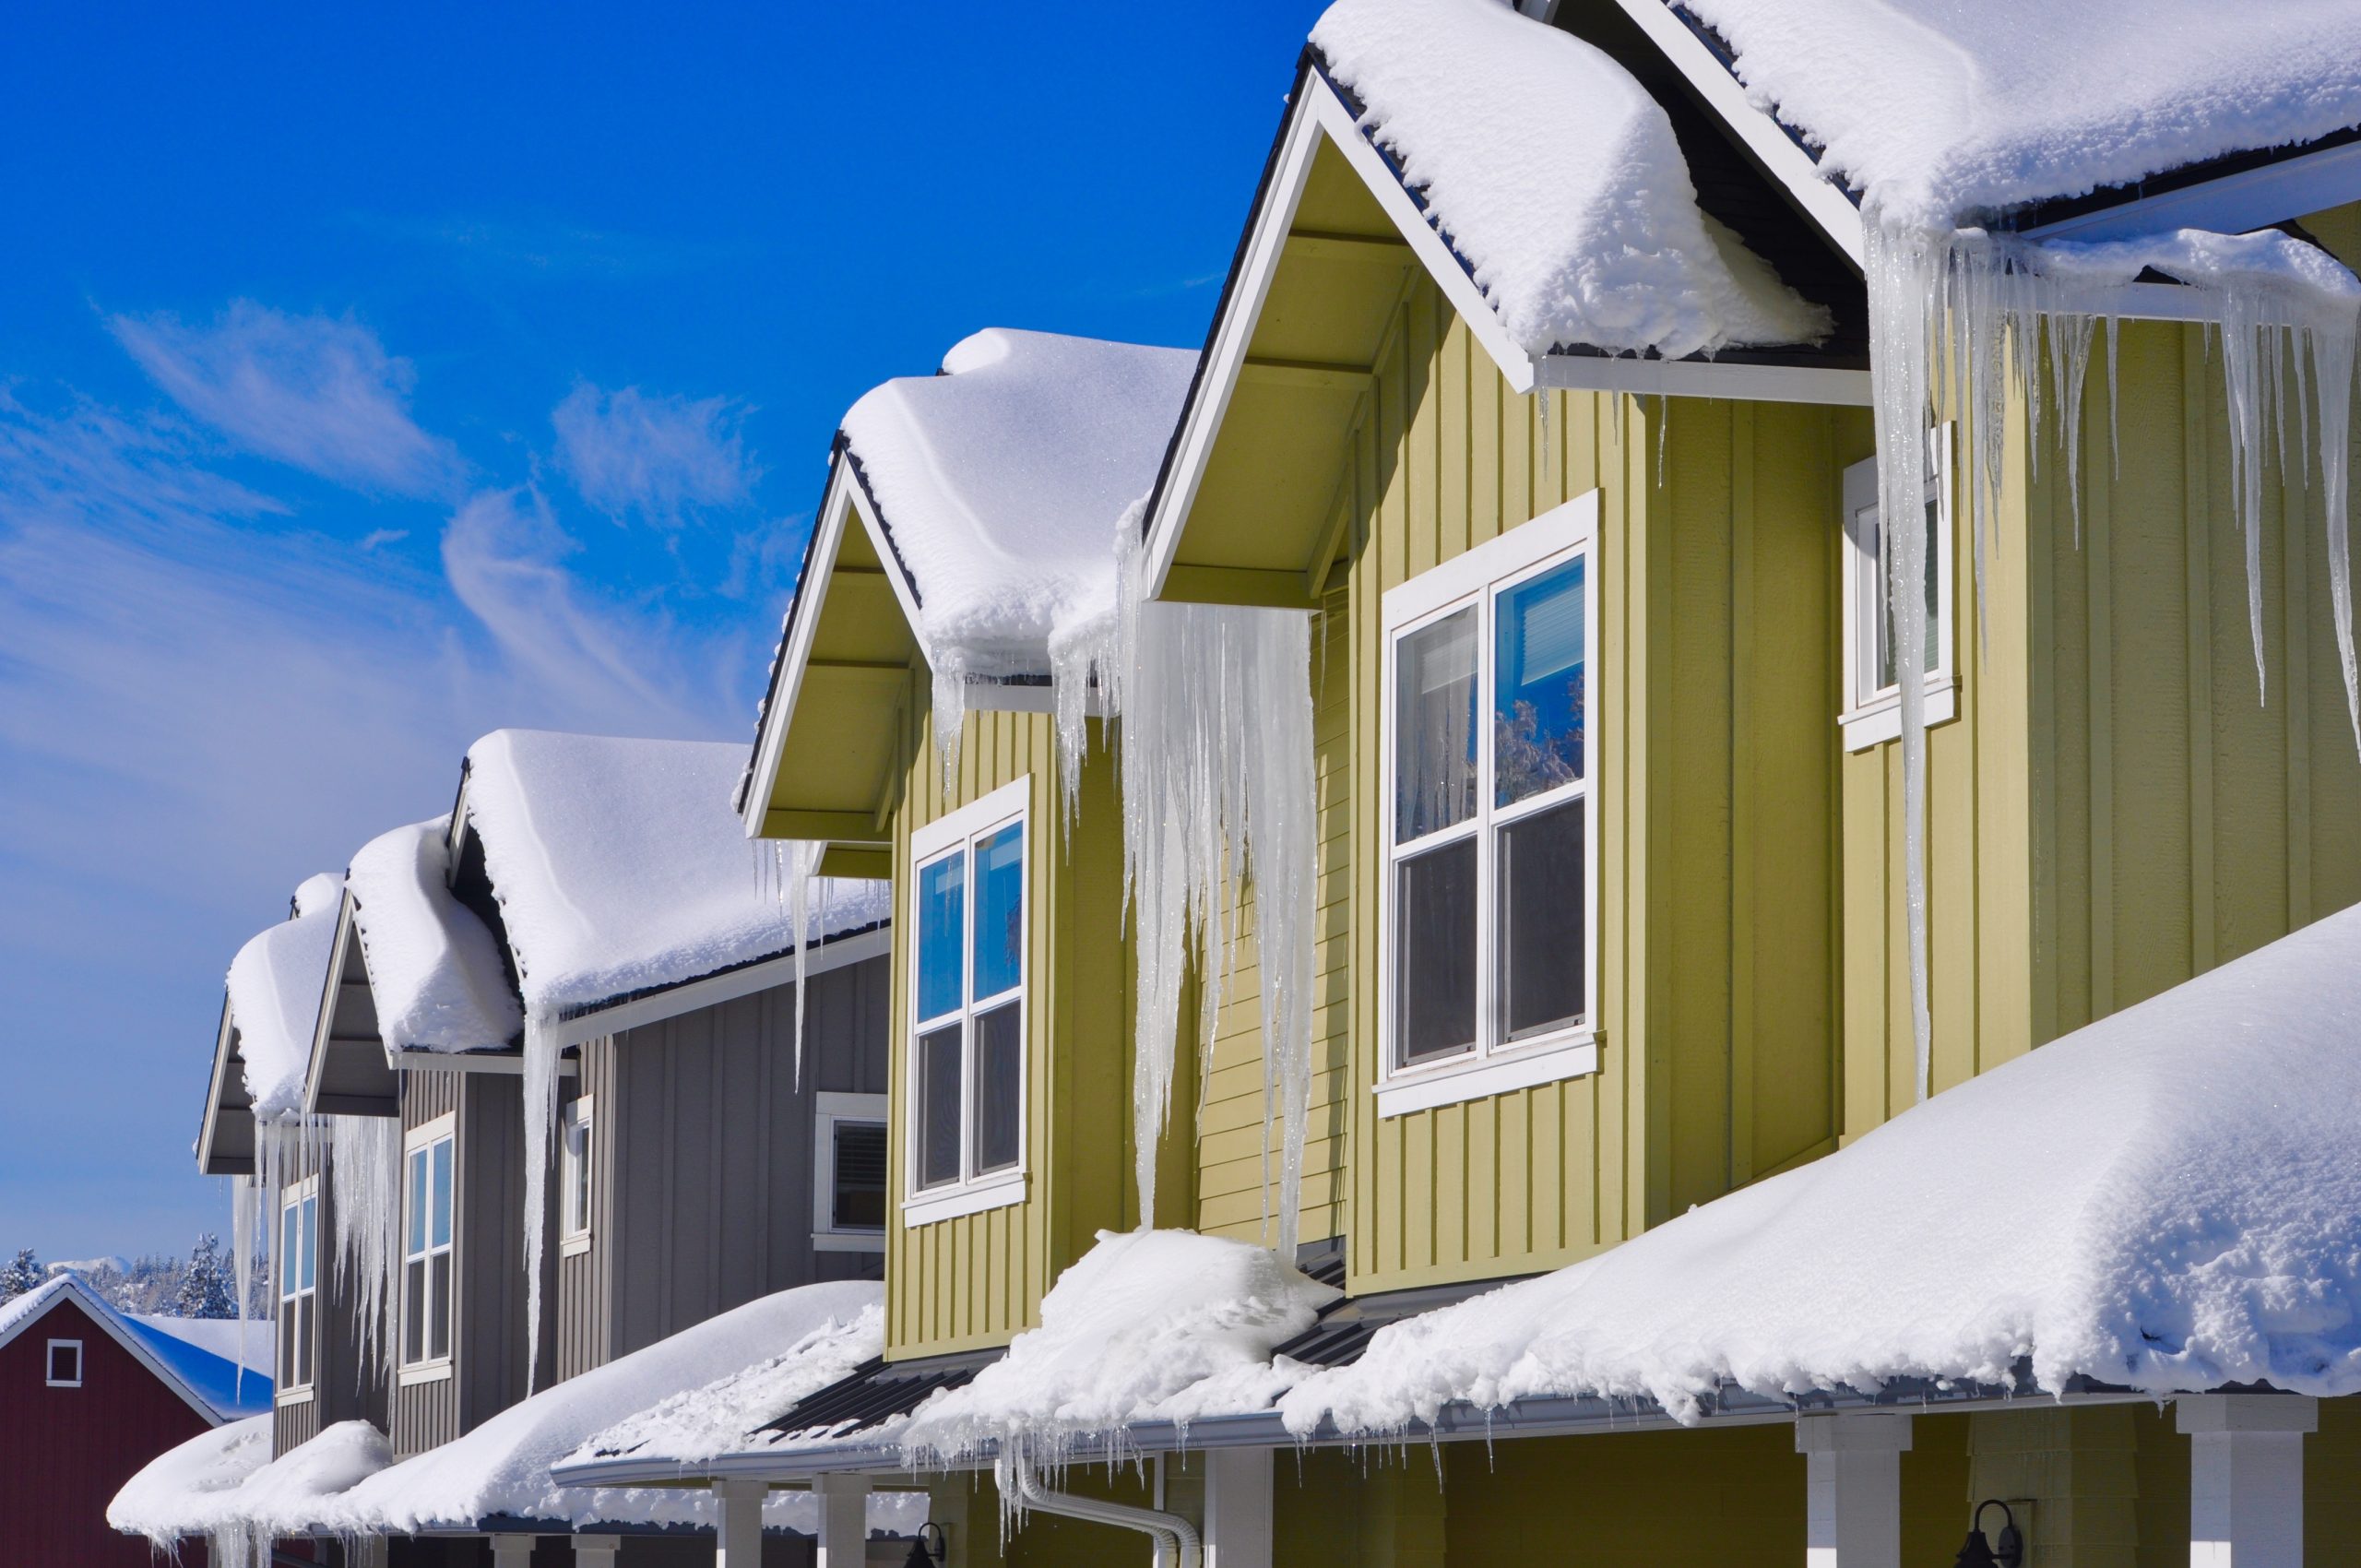
The last month has been unusually cold and snowy here in my hometown of Bend, Oregon. As I walk through the snowy streets, I’m seeing ice dams with their associated icicles cascading from roofs all over town. It paints a pretty picture, but the reality is that it’s very damaging to buildings. Ice dams growing along the eaves prevent water from draining off the roof as snow melts. It doesn’t take long for water to back up under roofing shingles and run into walls and ceilings. This damages insulation, gypsum board and, if uncorrected, can lead to structural decay. It’s sad that many of the homes I see with this problem were built in recent years, even though the solution is well known.
But first, let’s revisit the process that leads to this problem. An ice dam is caused largely by heat loss from a building. Warm air in the attic melts snow on the surface of the roof. As snow turns to water, it flows down to the eaves. The eaves are cold because they stick out into the surrounding air away from the building, so the water freezes. It doesn’t take long for a small glacier to form, and when the glacier gets high enough, water begins to back up. I’m seeing ice accumulations as thick as 10 inches here. Fluffy snow has an insulating value of about R-1 per inch, so a thick layer of snow can actually make the problem worse by isolating the roof surface from the cold, outdoor air.
When I teach building science to builders, designers and others in the construction industry. I always mention ice dams. It’s one way to emphasize the importance of two key elements of high-performance home design: air sealing and insulation. Improving these elements can greatly reduce, and even eliminate, the chances of ice dams forming in the first placen.
Air Sealing
Much of the heat in an attic comes from warm air that leaks out from the living space. Small streams of indoor air rise through openings around pipes and wires. Recessed lights can be a major source of air leakage into attics. That’s one reason air sealing the attic is a key component of zero energy construction that we cover extensively here at the Zero Energy Project.
Forced-Air Ductwork
If ducts run through an unconditioned attic, they will increase the temperature and drive ice dam formation. When the heating system is running, air in ducts will be anywhere from 105 to 140 degrees F. Standard duct insulation is far lower than building insulation. Ducts have R-8, even in certified energy-efficient homes. Compare that with attic insulation that should be at least R-50. To make matters worse, ducts leak warm air directly into the attic. In new construction, it’s best to create a design that allows ducts to run through conditioned spaces rather than the attic. For existing homes, sealing the ducts can reduce leakage.
Insulate The Attic Perimeter
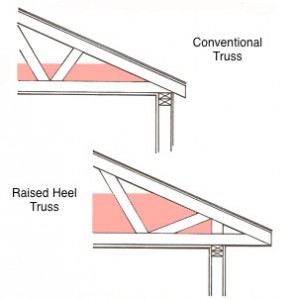
In most homes, the roof structure is built in a way that prevents adequate insulation depth near the eaves. The typical roof truss leaves little, if any, room for insulation above the top plate of exterior walls. This leads to snow melting in the perfect location to form an ice dam. Building scientists have been suggesting ways to increase the insulation value at the roof perimeter for decades. Ideally, the R-value at the perimeter should be same as in the middle of the building.  Raised heel roof trusses can be ordered with the required depth at the point where the truss sits on the exterior wall. Vaulted ceilings offer a slight advantage in that rafters don’t pinch the space at the eaves the way that ordinary trusses do. Rafters framed with 2x12s provide enough depth at the eaves for sufficient insulation. While there are many solutions, we like the idea of using i-joists for rafters, because they can be 12 to 16 inches deep.
Cold-climate Roofs
In extremely cold climates, and especially those that receive an abundance of snow, the best approach is to place rigid insulation on top of roof sheathing in addition to the cavity insulation between rafters. Insulation boards are held in place with furring strips that also create a ventilation space. Placing ventilation above the insulation and below the roof sheathing is the gold standard for preventing ice dams.
Roof Ventilation
The key to preventing ice dams is to keep the roofing material as close to the outside temperature as possible. That’s one function of ventilation. Outside air is allowed to enter and exit through a series of vents. About half of these vents are located near the bottom of the slope while the other half are located near the top. Ventilation is required by code for attics and vaulted structures. Unfortunately, deep snow can cover vents located on the upper surface of the roof, making them ineffective for preventing ice dams. Vents located in soffits actually displace the much-needed insulation in it’s most critical location. One solution for soffit vents replaces a typical cardboard or plastic vent baffle with a sheet of rigid insulation. The sheet is positioned to direct air into the attic space above the fiberglass insulation. Depending on its thickness, the rigid insulation could provide R-5 to R-10, which, while a touch low, is certainly better than nothing.
Bottom Line
It’s true that all these ideas cost more than typical construction. But they are far less expensive than repairing damage from ice dams. All the solutions outlined above have the added benefit of improving energy performance and saving money, proving that the investment in good design and smart construction practices comes back in performance and durability.
We seem to view ice dams as a result of the weather, and therefore, beyond our control. Instead, we suggest assigning blame for ice dams to construction practices. That gives builders and designers the opportunity to take a risk and turn it into a benefit.


doug says:
So why are’nt the features u describe required in municipal building codes? They may be more expensive initially, but long term costs are minimized to avoid ice dam repairs or retrofits to existing structures. Is there a local builder’s association that can politically support necessary code revisions?
Bruce Sullivan says:
Good question. I think they should be. Any code officials out there?
Stuart Krantz says:
Thanks for your article – it revealed to me why they put raised heels in my (under construction) net Zero new home – how about this problem: Builder did as you show: raising outside wall sheathing over heels for fastening but skipping Energy Star Required step of sealing wall sheathing to ceiling air barrier. I was livid. We went around caulking and taping top plate to sheathing but it was almost a two-day job and awkward. What is the preferred and “usual” way to seal the thermal envelope with a raised-heel truss? Thanks!
Bruce Sullivan says:
Air sealing for raised heel trusses is really no different than standard trusses. You used the exterior sheathing as the air barrier. Tape works fine. I encourage builders to instruct the framers to apply construction adhesive around the perimeter of sheathing as they assemble the wall. It’s not much trouble and the material is readily available. That works well, but it’s difficult to confirm that it was done properly. You should also seal the face of the top plate to the interior drywall. This can be done with drywall adhesive or a gasket. Here are a couple of pages with more detail:
https://zeroenergyproject.com/build/twelve-steps-affordable-zero-energy-home-construction-design/super-seal-net-zero-building-envelope/
https://zeroenergyproject.com/2016/06/01/defining-the-thermal-boundary/
Arthur Augenstern says:
Good information…interesting and informative
Tom inglesby says:
Could you develop some courses that give the realtors some CE credit towards our 2 year requirement. Trade allies have to have 4 credits why can’t you make them inter changeable? Great article. Tom inglesby remax
Bruce Sullivan says:
There are quite a few such courses. You can see a good list at:
https://zeroenergyproject.com/sell/net-zero-home-sales-appraiser-courses-online/